The best enshrouded base builds are not castles with twelve empty rooms. They are working camps that shorten travel, protect your crafting stations, and give you somewhere reliable to recover after a bad run through the Shroud. Build what keeps you alive first. Decoration comes after your storage, sleeping space, crafting flow, and escape route are handled.
I have rebuilt enough survival-game bases to know where players lose time. They spread stations across a pretty yard, place storage wherever there is open ground, then spend half the session running between a workbench, chest, and flame altar. A good base solves tomorrow’s problem early without turning today’s resource haul into a construction project.
Choose the Location Before the Floor Plan
Start with access, not scenery. A useful location sits near a Flame Altar, has reasonably level ground, and gives you a short route toward wood, stone, water, and common early crafting materials. You do not need to build directly beside every resource. You need a location that lets one gathering loop serve several needs at once.
Avoid deep slopes for your first permanent camp. Uneven terrain creates awkward walls, floating floors, and gaps that make expansion irritating. A broad plateau or gently rising field is worth more than a dramatic cliff view. Cliffs can work for a later fortress, but they often force you to spend valuable materials on stairs and platforms before your core production is ready.
Think about danger as well. You want enough distance from aggressive enemies that a stray patrol does not interrupt every crafting session, but you should not isolate yourself so completely that each trip becomes a long hike. In solo play, a compact central location usually wins. In co-op, place the camp where several players can leave in different directions without crossing through one another’s work areas.
A simple test works well: stand at the proposed Flame Altar and imagine returning with a full inventory. Can you reach storage, repair tools, cook food, and sleep without climbing a staircase or circling a wall? If not, keep looking.
The Early Base Layout That Actually Works
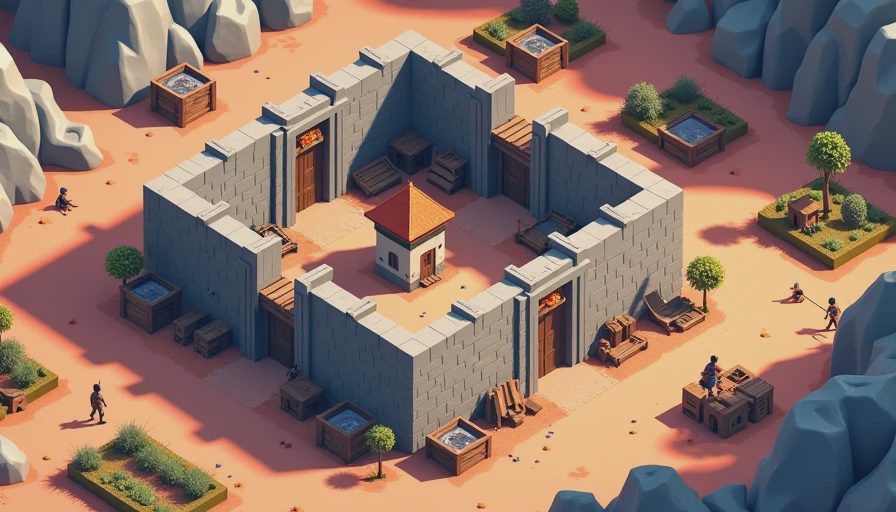
The most dependable enshrouded base builds use a central room with short paths branching to specialized areas. Put the Flame Altar in a position that feels central rather than at the edge of the property. Build storage close to the main entrance, then place the workbench and basic crafting stations within a few steps of those containers.
Keep cooking near food storage, but do not bury it behind decorative furniture. Your first kitchen only needs a fire, cooking station, and room to add better equipment later. Put the bed or sleeping area somewhere quiet and easy to reach. If you play with friends, leave enough open floor for extra beds and personal storage instead of forcing everyone into a cramped corner.
A strong starter footprint can be surprisingly small. One room for storage and general crafting, one covered sleeping area, and a separate space for cooking and production is enough for the early stretch. Leave one wall or side open for expansion. That empty strip is not wasted space; it is your answer when new NPCs, stations, or crafting chains enter the run.
Storage deserves more planning than decoration. Use separate containers for building materials, metals, food, weapons, and odd crafting components. Labeling helps, but physical placement matters more. Keep frequently used materials closest to the workbench and place rare or finished items farther away. When a recipe needs wood, stone, and plant fiber, you should be able to collect the ingredients from one section instead of searching every chest.
Build Around Crafting Flow
Many enshrouded base builds fail because they look organized from the outside but create needless walking inside. The fix is to group stations by the work they support. Basic tools and construction materials belong near the entrance. Smelting and metal-related production can share a room or covered yard. Cooking, farming, and plant processing should stay together because their ingredients overlap.
Leave clear walking lanes between stations. A one-tile gap can be the difference between smooth movement and constantly bumping into benches, chests, or another player. Put visual landmarks at room entrances, such as a different wall material or floor pattern. In a large base, those details save more time than another decorative beam.
Use vertical building carefully. A second floor is useful for beds, trophies, and low-frequency storage, but it is a poor place for your main crafting stations. If you must climb stairs to repair, cook, or unload after every expedition, the design is working against you. Put high-use equipment at ground level and reserve upper rooms for things you access occasionally.
Lighting is practical, not just cosmetic. Dark corners hide containers and make night repairs slower. Place lights near doors, stair landings, storage walls, and production areas. You do not need to cover every surface with lanterns; you need enough consistent light to read the room at a glance.

Plan Expansions Before You Need Them
The smartest enshrouded base builds grow in modules. Instead of replacing the starter hut, attach a new room when a new crafting chain becomes important. A production wing can hold advanced stations, a farm section can handle plants and water access, and a defense side can provide a controlled approach to the entrance.
Use repeatable room dimensions where possible. Matching floor widths make later wall additions much easier, especially when you are using stairs, roofs, or upper platforms. Before placing a permanent roof, walk the outside perimeter and confirm there is space for another room. A base that fills its entire plot on day one becomes expensive to remodel.
Keep one chest or temporary staging area near the front door. This is where you drop loot before sorting it properly. It prevents valuable materials from being scattered across the floor and keeps you from carrying a full inventory while trying to place walls. Sort the staging chest after each major run, not after it becomes a buried archaeological site.
Co-op groups should assign zones without turning the base into private property. One player can manage food and farming, another can focus on metal production, and another can handle building materials. Still, leave shared storage clearly marked and accessible. The worst multiplayer layout is a collection of locked-looking personal corners where nobody knows whether a chest contains nails or someone’s favorite sword.
Defensive Details Worth Building
You do not need a massive fortress before your character can survive ordinary threats. A clear entrance, a few walls, reliable lighting, and enough open space to fight if something reaches the camp are more valuable than a decorative maze. Keep the main door visible from the central room so returning players can orient themselves quickly.
Avoid placing valuable stations directly against exterior walls. If enemies damage the structure or you later remodel that side, you can lose access to the station or create an awkward repair job. Leave a narrow service gap where practical, especially around important production equipment.
A raised lookout can help you spot trouble, but do not confuse height with protection. Stairs and exposed platforms create their own problems if enemies reach the base. Build a safe fallback position with room to move rather than a tiny tower that traps you against a railing.
For most enshrouded base builds, defense means buying time and preserving access, not creating an elaborate siege machine. Keep healing items and spare tools in a known chest near the entrance. If a run goes badly, you should be able to recover, repair, and leave again without searching the whole building.
A Practical Upgrade Order
Start with the Flame Altar area, shelter, bed, basic storage, and essential crafting stations. Next, improve the roof, lighting, and walking lanes. After that, add dedicated production rooms and a larger storage system. Farming, display rooms, tall towers, and elaborate exterior walls can wait until your resource routes are stable.
When comparing enshrouded base builds, ask three questions: how many steps does a normal crafting task require, how easily can the base expand, and what happens when you return overloaded after a dangerous expedition? If the answer is short, flexible, and obvious, the design is doing its job.
Before logging out, put unfinished materials into labeled storage, repair commonly used tools, and leave the entrance clear. That small routine saves time every session. A base should make the next launch easier than the last one, not demand another hour of cleanup.
Good enshrouded base builds are functional first and impressive second. Build what keeps you alive first, leave room for tomorrow’s stations, and let the grand hall come after your survival loop works.
No letters yet.